
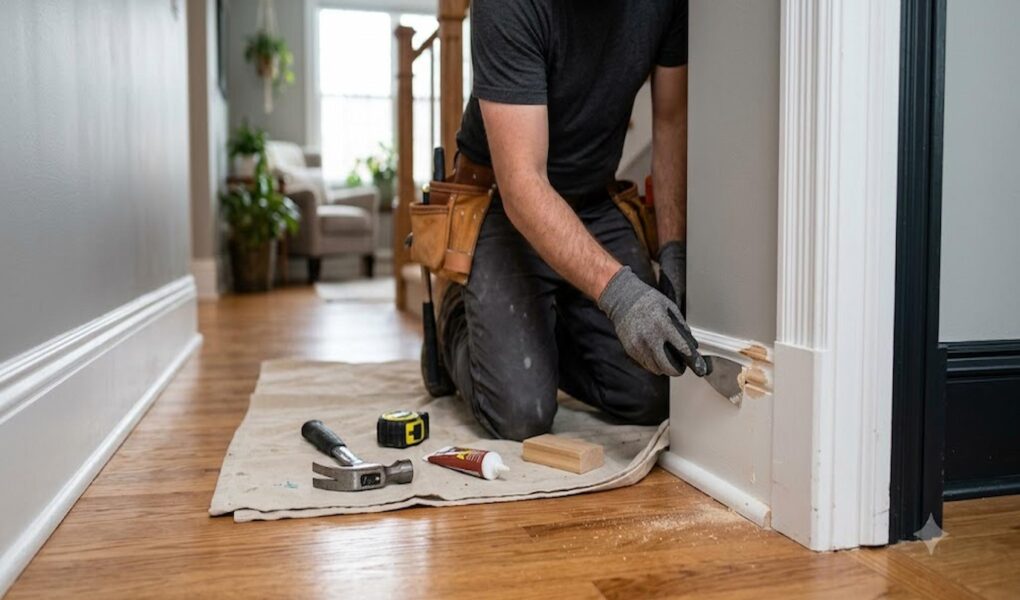
Trim, baseboards, and molding may seem like minor details, but they have a major impact on how a home looks and feels. Clean, well-maintained trim creates crisp lines, frames doors and windows beautifully, and gives every room a polished appearance. On the other hand, chipped paint, dents, gaps, and loose molding can make even a freshly painted room feel unfinished.
The good news is that most trim repairs are straightforward and affordable. With a few basic tools, some patience, and the right repair techniques, homeowners can restore damaged baseboards, crown molding, door casings, and decorative trim without replacing everything.
This guide explains how to identify common trim problems, repair damage, fill gaps, repaint surfaces, and match existing finishes so your home looks clean, finished, and well cared for.
Why Trim Matters More Than You Think
Trim serves both practical and decorative purposes. It covers expansion gaps, protects walls, frames architectural features, and creates visual transitions between surfaces.
Well-maintained trim can:
- Improve the appearance of every room
- Increase perceived home value
- Hide construction joints
- Protect walls from everyday bumps
- Create a finished, professional look
- Complement flooring and paint colors
Even small repairs can dramatically improve a room without a major renovation.
Common Types of Interior Trim
Understanding the different kinds of trim makes repairs much easier.
Baseboards
Baseboards run along the bottom of walls where they meet the floor. They protect drywall from vacuum cleaners, furniture, shoes, pets, and everyday wear.
Common issues include:
- Scuff marks
- Water damage
- Cracks
- Loose sections
- Peeling paint
Crown Molding
Crown molding sits where walls meet the ceiling and adds architectural character.
Problems often include:
- Corner separation
- Small cracks
- Paint peeling
- Joint gaps
- Water stains
Door Casings
Door trim frames each doorway and hides the gap between the wall and door frame.
Typical damage includes:
- Dents
- Loose trim
- Nail holes
- Scratches
- Paint damage
Window Trim
Window molding creates clean transitions around windows while covering installation gaps.
Common repairs involve:
- Caulking failures
- Cracked paint
- Moisture damage
- Small chips
Decorative Wall Molding
Chair rails, picture molding, and decorative trim can suffer from impacts, aging, or settling.
Fortunately, these repairs are usually cosmetic and inexpensive.
Inspect Trim Before Starting Repairs
A careful inspection helps determine whether trim needs repair or replacement.
Look for:
- Loose boards
- Missing nails
- Cracked joints
- Water damage
- Rot
- Deep dents
- Gaps between trim and walls
- Paint failure
- Mold or mildew
If wood feels soft or crumbles easily, moisture damage may require replacing the affected section instead of repairing it.
Essential Tools for Trim Repair
Most projects require only a few basic tools.
Helpful supplies include:
- Putty knife
- Utility knife
- Caulk gun
- Wood filler
- Paintable caulk
- Sandpaper (120–220 grit)
- Nail set
- Hammer
- Finish nails
- Paint brush
- Primer
- Matching paint
- Wood glue
- Painter’s tape
- Measuring tape
These simple tools can handle the majority of common trim repairs.
Repairing Damaged Baseboards
Baseboards experience more abuse than almost any other trim.
Small dents and scratches can usually be repaired with wood filler.
Step 1
Clean away dust and loose paint.
Step 2
Fill dents with wood filler using a putty knife.
Step 3
Allow the filler to dry completely.
Step 4
Sand the repair smooth.
Step 5
Prime if necessary.
Step 6
Repaint the repaired area to match the surrounding trim.
When finished carefully, repairs become nearly invisible.
Fixing Loose Baseboards
Loose trim often develops as homes naturally settle.
The repair is simple.
- Press the board firmly against the wall.
- Secure it with finish nails.
- Sink nail heads using a nail set.
- Fill nail holes.
- Sand lightly.
- Touch up with matching paint.
For longer sections, adding a small amount of construction adhesive behind the trim provides additional support.
Repairing Dents and Gouges in Wood Trim
Furniture impacts commonly leave dents in door casings and decorative molding.
Minor dents:
- Fill with wood filler.
- Sand smooth.
- Prime.
- Paint.
Deeper gouges:
- Apply filler in multiple thin layers.
- Allow each layer to dry fully.
- Sand until level with surrounding wood.
Avoid overfilling, which creates extra sanding work.
Repairing Cracked or Split Trim
Small cracks often appear near nail holes or joints.
For hairline cracks:
- Apply paintable caulk.
- Smooth with a damp finger.
- Allow to dry.
- Paint.
For wood splits:
- Apply wood glue inside the crack.
- Clamp if possible.
- Fill remaining imperfections.
- Sand smooth.
- Repaint.
Filling Gaps Between Trim and Walls
One of the quickest ways to improve a room is sealing visible gaps.
These gaps often develop because of seasonal expansion and normal settling.
Use high-quality paintable caulk.
Run a smooth bead along the gap.
Then smooth it with:
- A damp finger
- A caulk finishing tool
- A wet sponge
After drying, paint over the caulk for a seamless appearance.
Proper caulking also helps block dust and small air leaks.
Repairing Crown Molding
Crown molding requires careful repairs because it sits at eye level.
Common repairs include:
- Filling corner gaps
- Re-caulking joints
- Replacing missing filler
- Repainting damaged sections
Avoid forcing separated joints together if structural movement caused the gap.
Flexible caulk usually provides a cleaner long-term solution.
Repairing Nail Holes
Old picture hooks and previous installations often leave nail holes.
These are among the easiest repairs.
Simply:
- Apply lightweight filler
- Smooth with a putty knife
- Allow to dry
- Sand lightly
- Prime if needed
- Paint
The repair should disappear after painting.
Removing Old Caulk
Old caulk eventually cracks, shrinks, or turns yellow.
Replacing it improves appearance immediately.
Remove old caulk using:
- Utility knife
- Plastic scraper
- Caulk removal tool
Clean the surface before applying fresh caulk.
This ensures proper adhesion and a cleaner finish.
Matching Existing Paint Finishes
A perfect repair depends on matching the existing finish.
Trim is commonly painted in:
- Semi-gloss
- Satin
- Gloss
Using the wrong sheen often makes repairs more noticeable than the original damage.
If possible, use leftover paint from the original project.
Otherwise, take a small removable trim sample or paint chip to a paint supplier for matching.
Repairing Painted MDF Trim
Many modern homes use medium-density fiberboard (MDF) instead of solid wood.
MDF repairs differ slightly.
Small dents repair well with lightweight filler.
However, water-damaged MDF usually swells permanently.
Once swollen, replacement often produces better results than repair.
Avoid soaking MDF during cleaning.
When Trim Should Be Replaced
Some damage is beyond simple repair.
Replacement is usually the better option when trim has:
- Extensive rot
- Severe water damage
- Large missing sections
- Heavy warping
- Repeated repairs that remain visible
- Insect damage
Fortunately, replacing a single board is often inexpensive.
Painting Trim Like a Professional
Fresh paint completes every repair.
For best results:
- Clean surfaces first.
- Fill all holes.
- Sand smooth.
- Remove dust.
- Apply primer where needed.
- Use long, even brush strokes.
- Avoid overloading the brush.
- Allow adequate drying time.
Multiple thin coats produce smoother finishes than one thick coat.
Preventing Future Damage
Simple habits help trim stay attractive for years.
Try these maintenance tips:
- Vacuum baseboards regularly.
- Wipe off dirt and scuff marks.
- Keep pets’ nails trimmed.
- Use furniture pads.
- Repair moisture problems quickly.
- Touch up chips before they spread.
- Inspect caulk annually.
- Repaint worn trim every few years.
Routine maintenance keeps repairs small and inexpensive.
Common Trim Repair Mistakes to Avoid
Many DIY repairs fail because of simple errors.
Avoid these common mistakes:
- Skipping surface cleaning
- Applying too much filler
- Sanding before filler dries
- Using non-paintable caulk
- Forgetting primer
- Choosing the wrong paint sheen
- Ignoring water damage
- Rushing between coats
Taking your time almost always produces a better finish.
Frequently Asked Questions
What is the best filler for damaged baseboards?
A quality wood filler works well for wood trim, while lightweight spackling compound is suitable for small nail holes and minor cosmetic repairs.
Should gaps between trim and walls be caulked?
Yes. Paintable caulk creates a smooth, finished appearance and helps prevent dust, drafts, and visible cracks caused by normal home movement.
How do I match old trim paint?
If you have leftover paint, use it for touch-ups. Otherwise, take a paint chip or removable trim sample to a paint store for a color and sheen match.
Can damaged crown molding be repaired?
In many cases, yes. Small gaps, cracks, and dents can usually be repaired with caulk, wood filler, sanding, and repainting. Severely cracked or water-damaged sections may need replacement.
Conclusion
Trim, baseboards, and molding may be subtle design elements, but they have a remarkable influence on the overall appearance of a home. Repairing dents, sealing gaps, replacing damaged caulk, and applying fresh paint are affordable improvements that can make every room feel cleaner, brighter, and more refined.
With the right tools, careful preparation, and attention to detail, most trim repairs are well within the reach of DIY homeowners. Regular maintenance also prevents small cosmetic issues from becoming larger, more expensive problems. Whether you’re preparing your home for guests, planning to sell, or simply taking pride in your living space, well-maintained trim provides a polished finish that enhances every room.